
ZenGrove
Built to move. Down to the last leaf.
Built to move. Down to the last leaf.
The ZenGrove 1.0.0 reference: 52 nodes, 907 settings and short WebM demos. Explore Look At asset orientation, GameDynamics, joint previews, skeletal export and per-leaf random vertex colors. Requires AO.Hub 1.6.6 or later.
Build a plant by connecting a few nodes, then refine each part. The reference below shows every available node and its settings in Maya. Reference checked for ZenGrove 1.0.0 on 22 October 2026. Requires AO.Hub 1.6.6 or later. Update the Hub before installing ZenGrove.
- Start with Tree Root → Trunk → Branch. Add Twigs for a finer layer.
- Create a leaf with Asset Generator, or capture meshes with Asset Collection. Connect Assets and the branch structure to Leaves.
- Connect the wood to Branches and Leaves to Growth on Output. Both wires are needed for wood and foliage. Use Build Preview while shaping, then Build High for the detailed result.
- Add Dynamics for motion, or start from an existing modeled trunk with Mesh Trunk.
Direct leaves and placed assets towards a point, away from it or along a direction with the Look At modifier. Aim leaf tips or normals, use a live Maya target and blend the effect with strength, radius and falloff. Read the workflow and all 15 settings →
ZenGrove 1.0.0 is out: explore GameDynamics, the experimental skeletal-wind workflow. Shape Trunk, Branches and Twigs separately, inspect the live joint hierarchy and export a skinned rig with a wind clip through Game Output. The standard-tree WebM shows the motion and its X-Ray joint preview in three seconds.
A different rhythm for every leaf. Vertex Color now includes Random Value (per Leaf). Store one stable 0–1 value across each leaf, with an independent seed per channel. Use it as a phase offset in your game-engine material alongside a Foliage Flutter mask; the shader supplies the movement.
Keep the character you shaped. Four Noise modes, editable leaf assets, precise foliage alignment and continuous root UVs remain part of the same graph. Use Dynamics for the separate Maya wind and leaf-flutter workflow, or GameDynamics for skeletal delivery. The reference explains the supported connections and export limits.
Explore all 52 nodes and 907 visible settings, with defaults, conditional controls and current UI captures. Short WebM highlights take three seconds; complete settings tours use one second per view and load when played.
Updating an older graph
Save a separate .aoveg copy before experimenting. Connect Branches explicitly to Output when you want wood. Earlier Twist nodes retain Branch mode; choose Along Branch for local tube twist. Earlier Cross Section nodes retain Local alignment; choose Ground or Parent when needed. Stored Surface Attachment choices are preserved. Existing Noise nodes retain Legacy mode; compare a rebuilt preview before choosing fBm, Domain Warp or Curvature.
Roots uses Count placement; Branch and Twigs also support Spacing. A migrated graph that already stored Count cannot recover a previously removed spacing value. New controls start with their defined defaults, so compare a rebuilt preview with the saved scene.
Build previews and static variants
While shaping, use Build Preview, a manageable resolution and the Output preview limits. If interactive rebuilds interrupt editing, disable Auto Preview and build manually. Use the build status to distinguish filtered foliage, preview caps and actual generator counts. Performance work is ongoing.
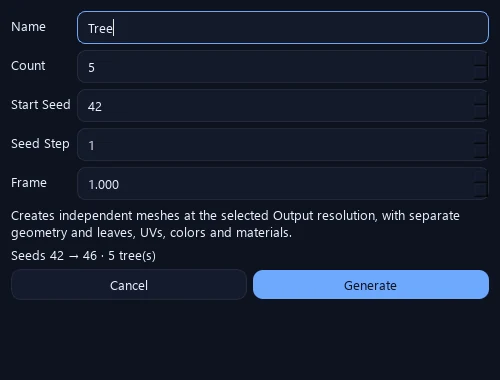
For independent deliverables, use Settings → Generate Static Mesh. Choose Name, Count (1–100), Start Seed, Seed Step and Frame. A batch of five starting at 42 with step 1 produces seeds 42–46. The snapshot uses the selected Output resolution, keeps separate wood and foliage meshes, and preserves UVs, colors, normals and materials. These copies survive Rebuild and Clear Generated; textures remain external resources.
Working in the node editor
Add a node, continue from an existing one, or move a group of connections in one gesture. Open a workflow below for the steps and views from ZenGrove in Maya.
The small circles on a node are its connection points, called sockets. In the usual bottom-to-top layout, inputs sit at the bottom and outputs at the top.
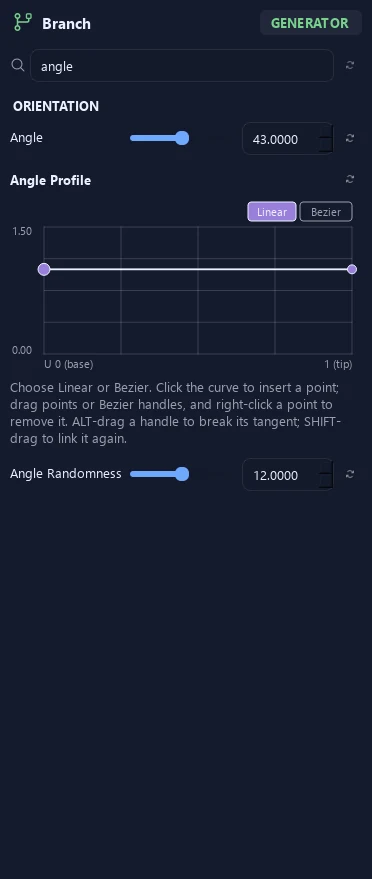
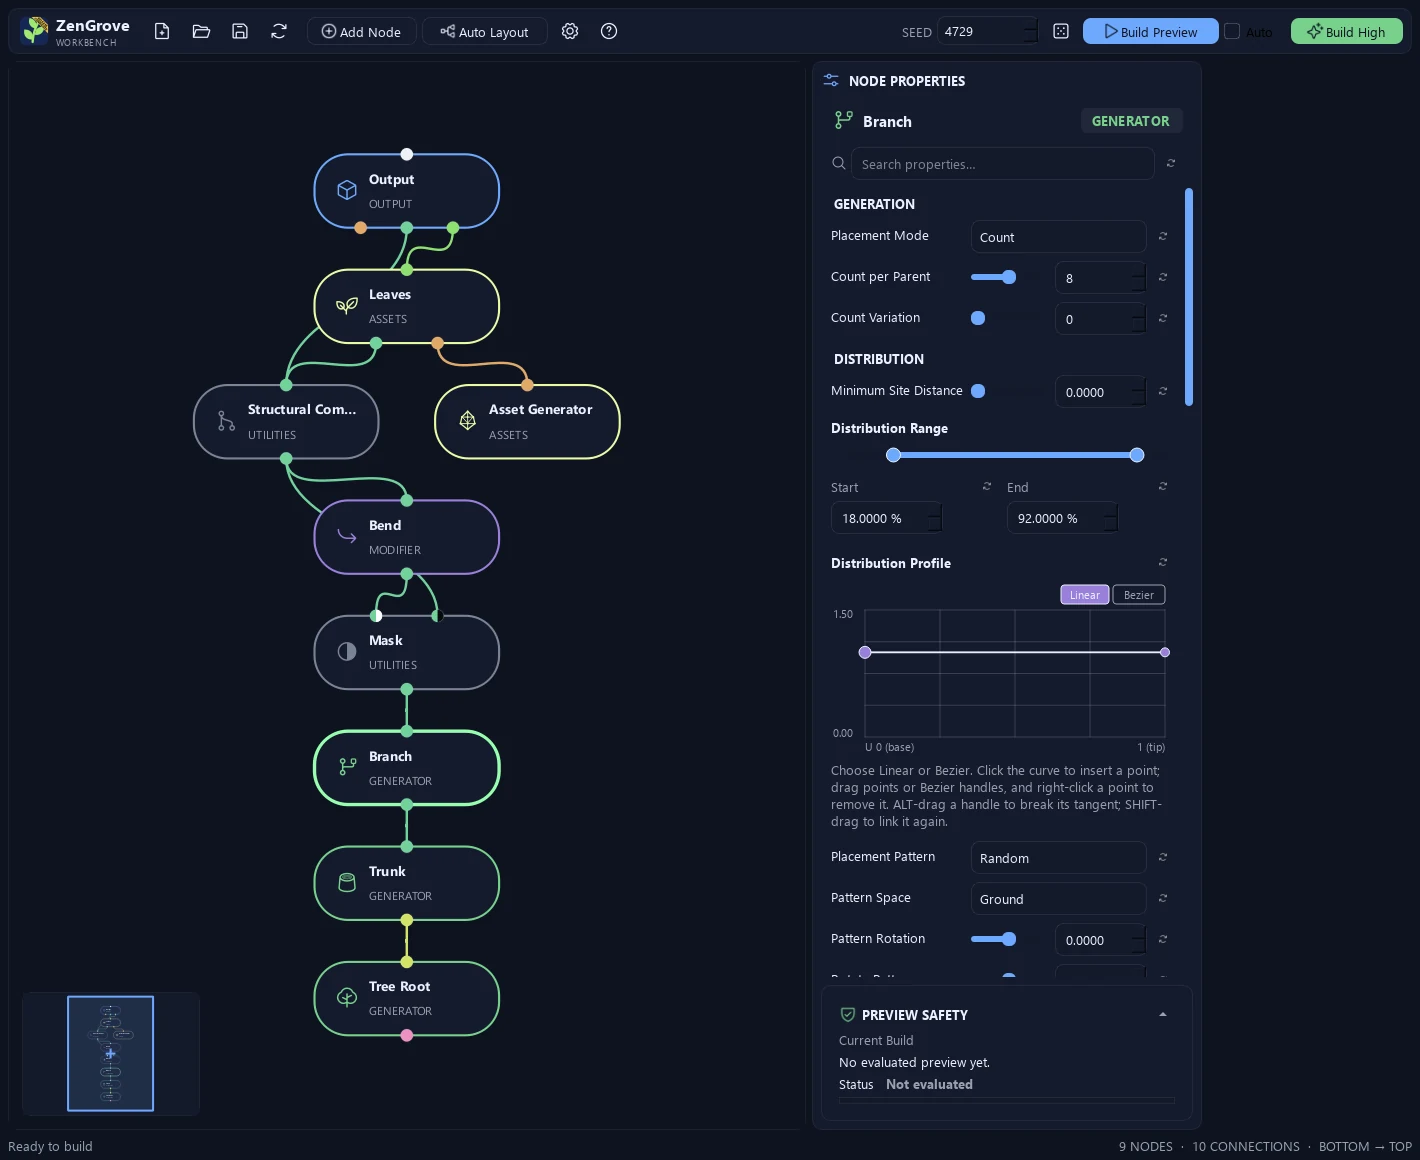
Search propertiesFind a control and keep more space for settings
- Select a node in the graph. Its name and Search properties… stay above the scrolling settings.
- Type part of a property name, such as angle. Matching controls and their headings stay visible. Search also finds internal parameter names and range labels.
- Matching advanced controls open automatically. Press Esc in the search field or click its reset arrow to show all properties again.
Filtering does not change parameter values or trigger Auto Preview. Use the arrow on Preview Safety to expand build details when needed; keep them collapsed for more parameter space.
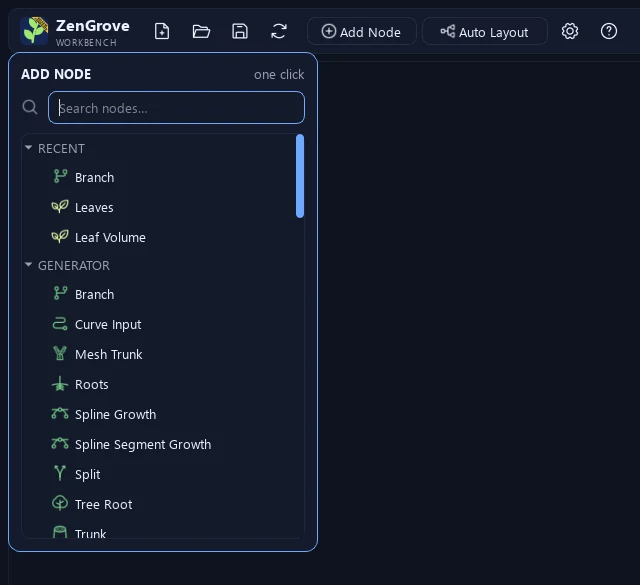
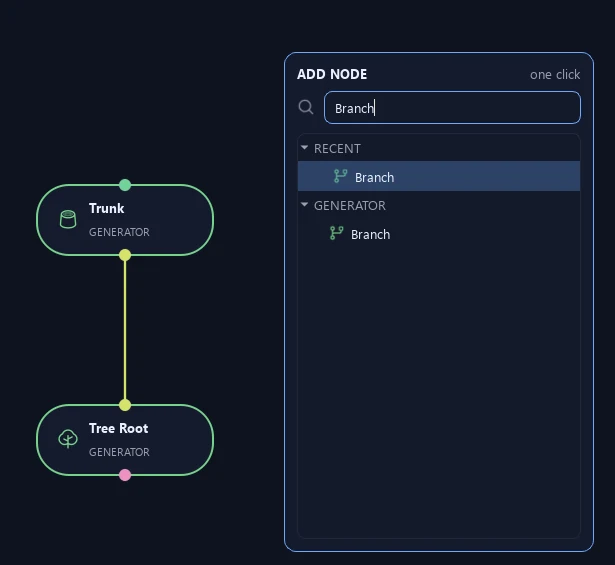
Add NodeSearch and browse the node library
- Click Add Node in the top toolbar.
- Type a name in Search nodes…, or browse a category.
- Click a node once to add it. You can also use the arrow keys and Enter in the search field.
The palette stays open, so you can add several nodes. Click Add Node again or press Esc to close it.
Use your selection: selecting a node first can attach the new node to it when the connections fit. Click empty graph space to clear the selection when you want to place nodes separately. Some generators can also find a suitable source already in the graph.
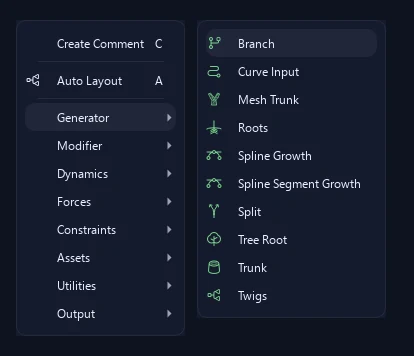
Right-clickAdd a node from the canvas menu
- Right-click an empty part of the graph.
- Open a category such as Generator, Modifier or Utilities.
- Click the node you want. For example, choose Generator → Branch.
The click position is the starting point for the new node. If it connects to a selected node or a suitable source, ZenGrove may rearrange the connected graph.
Drag into empty spaceCreate and connect in one go
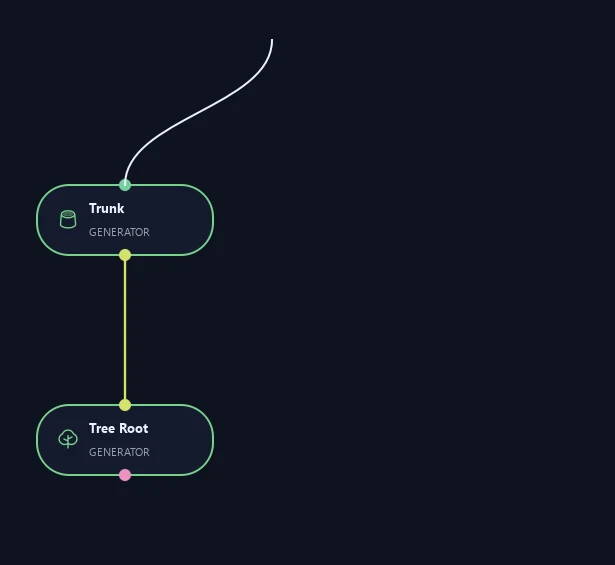
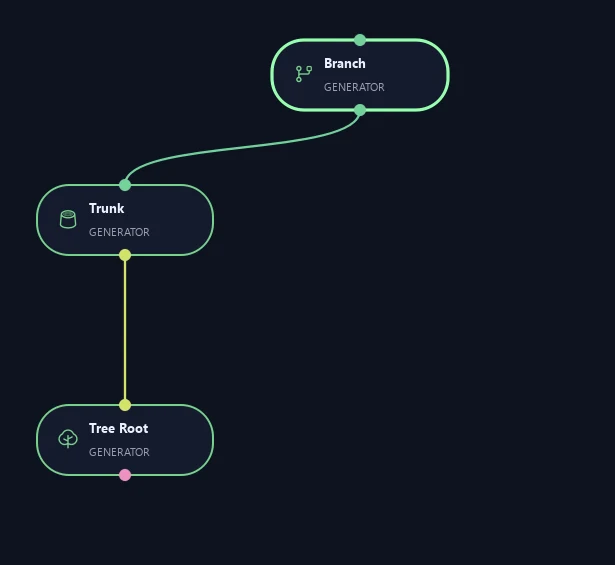
- Left-click and hold an output socket, then drag out a wire.
- Release over empty space inside the graph. Leave the pointer clear of nodes, existing wires and comment frames.
- Choose a node from the search. ZenGrove shows nodes that can use this output, then creates your choice at the release point and connects it automatically.
If the chosen node offers several suitable inputs and has no preferred one, choose an input from Connect To. Press Esc or click outside the search to cancel. Ctrl + Z undoes the new node and its connection together.
Start this gesture from an output without holding Ctrl. Dragging from an input into empty space does not open the node search.
Ctrl + dragReroute existing connections
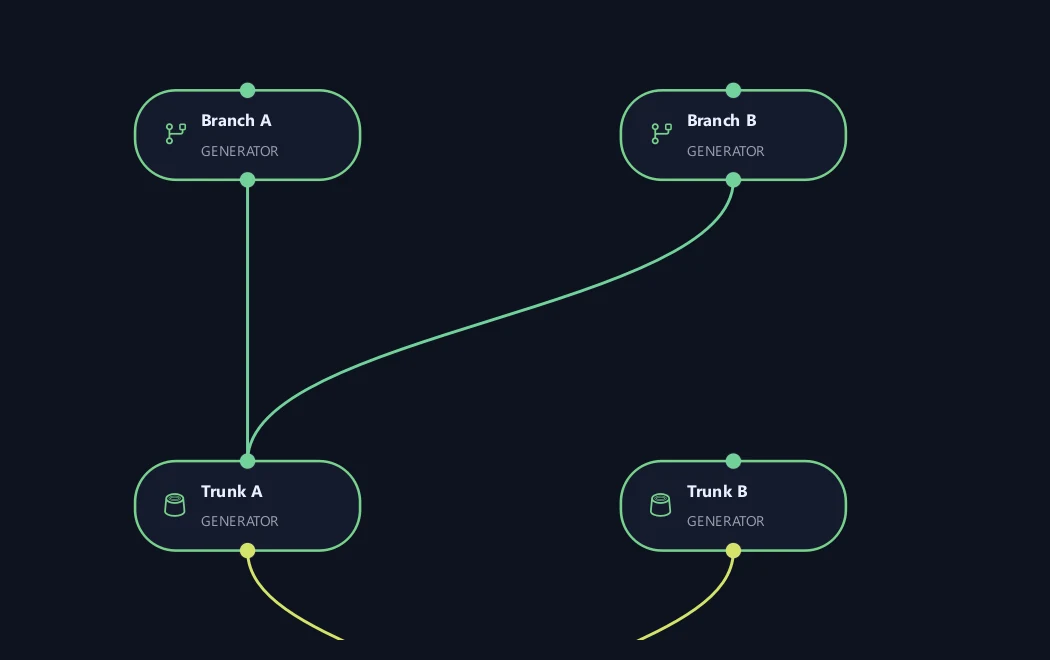
- Hold Ctrl, then left-click and hold a socket that already has connections.
- Drag to another compatible socket of the same kind: output to output, or input to input.
- Release to move the existing connections together. Their other ends stay connected.
For example, move the output of Trunk A to the output of Trunk B. Both Branch A and Branch B then receive their structure from Trunk B.
Cancel safely: press Esc to keep the original connections. Releasing over empty canvas disconnects the lifted wires; Ctrl + Z restores them. An incompatible move leaves the original wires in place. Moving onto a single-input socket that is already connected replaces its old connection.
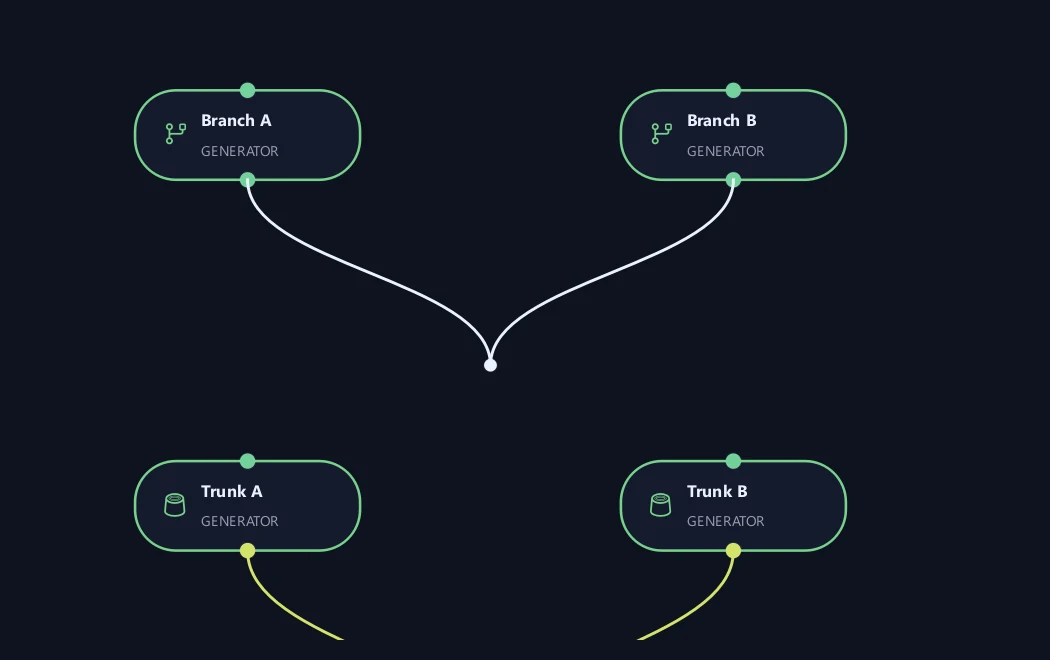
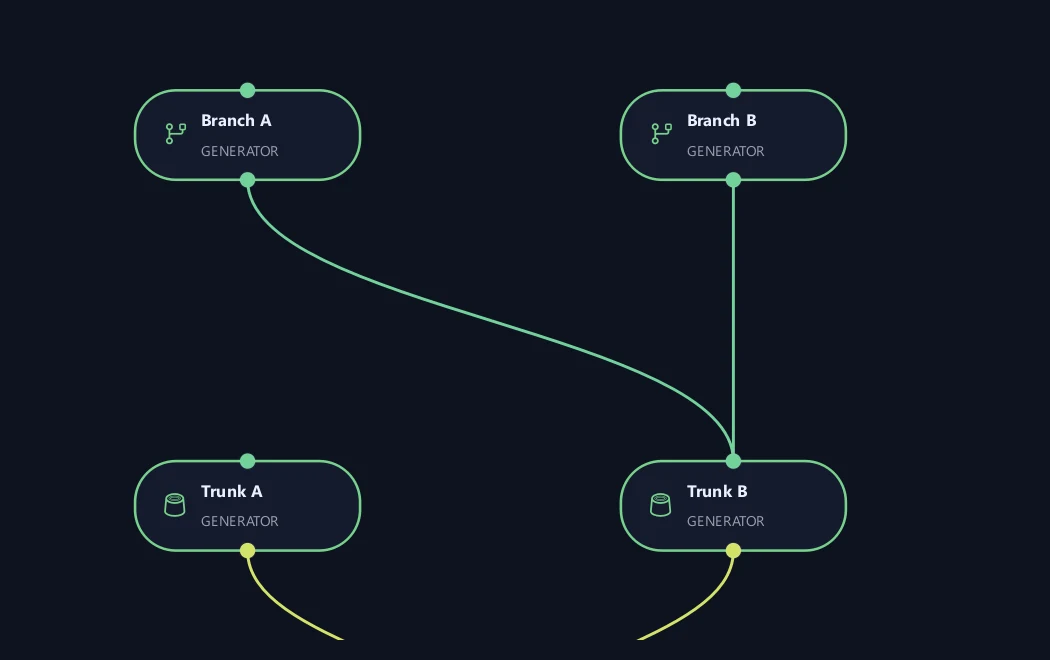
To tidy the path of a wire with a movable point, add a Reroute Knot from Utilities. The knot guides the wire without changing what passes through it.
Disconnect wiresCtrl + drag to empty canvas
- Hold Ctrl and drag a connected socket.
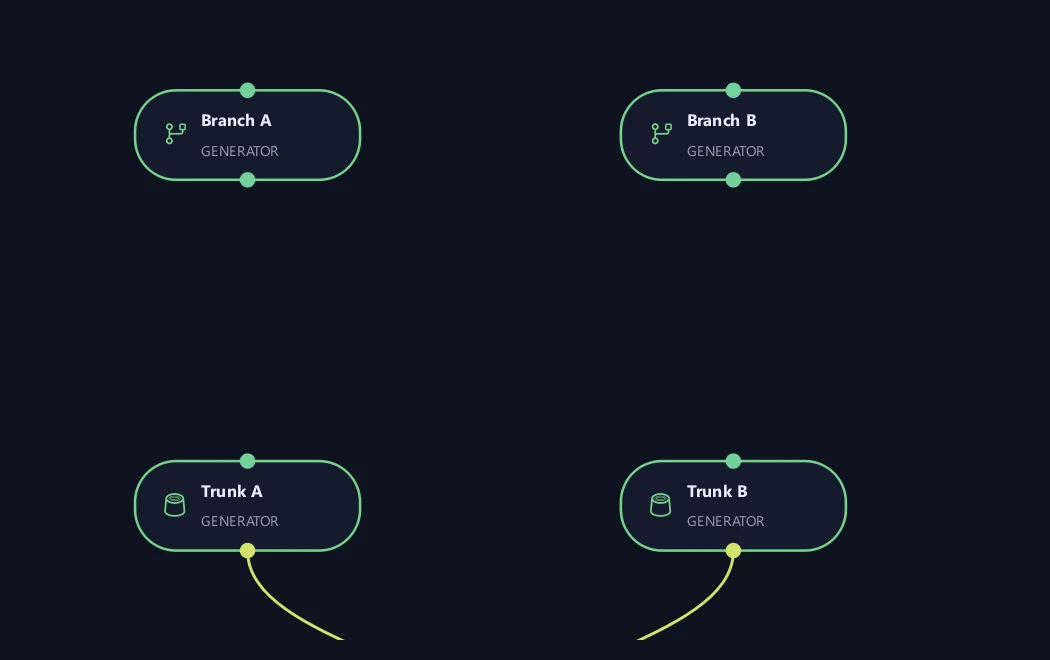
- Release on empty space inside the graph to disconnect its lifted connections. An output can lift several outgoing wires at once; an input lifts its incoming connections.
- Use Ctrl + Z to restore the wires, or press Esc before releasing to cancel the gesture.
Organize with commentsGroup a workflow and label its purpose
Select nodes and press C, or choose Create Comment from the context menu. Drag the frame to move its members and drag its bottom-right corner to resize it. Double-click its title to rename it. The context menu adds or removes selected nodes from membership and manages hidden comments.
Select a comment to edit Heading, Subheading, Color, Background opacity, Heading size and Subheading size in Properties. Reset arrows restore appearance defaults. Comment frames organize the graph; they do not alter geometry.
Generate Static MeshCreate independent seed variants
- Choose the Output for the intended tree and open the gear-shaped Settings menu next to Auto Layout.
- Choose Generate Static Mesh. Set Name, Count, Start Seed, Seed Step and Frame.
- For example, Count 5, Start Seed 42 and Seed Step 1 produce seeds 42–46. Press Generate to build the batch, or Cancel to leave the scene as it is.
The snapshot uses the selected Output resolution, without preview instance caps or LOD preview reduction. It creates separate wood and foliage meshes under each static group, preserving UVs, colors, normals and assigned materials. It does not weld the parts or bundle texture files. The working graph and its seed are preserved; static copies survive ordinary Rebuild and Clear Generated.
Settings and accelerationChoose Python, CPU or GPU
Open the gear-shaped Settings menu next to Auto Layout, then Acceleration. Choose Use Python, Use CPU multithreading, or Use GPU. The GPU submenu lists available devices and Automatic (prefer dedicated GPU).
GPU acceleration handles Dynamics wind and obstacle collisions; Noise, Curvature and other supported kernels run on the CPU. Device discovery may briefly show Finding GPUs… while the available choices are loaded. This choice is independent of Maya viewport settings. Finish an active build before changing acceleration. If a selected backend or device is unavailable, the error is shown and the previous setting is retained.
Settings also contains Add Game Pipeline, Preview Atlas, Export Game, Generate Static Mesh and Clear Generated. The adjacent Help menu opens Documentation in a separate browser window; Version shows the installed ZenGrove version.
Reading the controls
A parent is the branch that new growth attaches to. Start and End select a region along it: 0% is the base and 100% is the tip. Some ratio fields use decimals, so 0.5 means half.
For profile curves, click to add a point, drag to reshape and right-click a point to remove it. Linear makes straight transitions; Bezier adds smooth handles. Alt-drag a handle to unlink the tangents; Shift-drag to link them again. These gestures also apply to the closed Cross Section editor. Each profile's explanation tells you what its horizontal axis represents.
Type a number and confirm it to adjust beyond a slider's current range where the setting allows it. The slider recenters around that value. Percentage ranges, positive sizes and other meaningful limits still apply. Scrolling the settings panel does not change an unfocused number field.
The reset arrow restores one setting to its default. Advanced parameters opens less frequently used settings. A seed gives repeatable variation. Some controls appear only after selecting a mode; their pages show those additional views too.
All 52 nodes
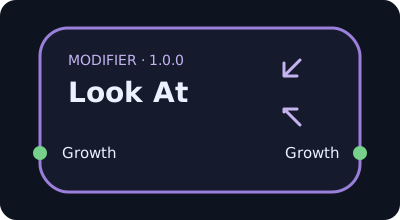
Look At
Aim placed leaves and assets. Look At points a leaf tip or normal towards a target, away from it or along a direction. Use coordinates or a live Maya object, blend the strength, limit the influence radius and add seeded random variation without moving attachment positions.
View node and settings →
Branch
Adds a new layer of branches to the incoming stems. Choose how many appear, where they appear and how their angle, length and thickness vary along the parent.
View node and settings →
Curve Input
Collects Maya curves as growth guides. Capture your drawn silhouette, then connect Spline Growth or Spline Segment Growth.
View node and settings →
Mesh Trunk
Uses an existing Maya trunk mesh as the starting structure for procedural branches and foliage. ZenGrove finds paths inside it while preserving the imported mesh's shape.
View node and settings →
Roots
Grows roots on selected procedural hosts with surface collars, directional trunk flare and ground following. Control placement, size profiles and how each root meets its host.
View node and settings →
Spline Growth
Grows tube branches along captured curves. Use it to draw a trunk, vine or branch by hand while keeping the rest of the plant procedural.
View node and settings →
Spline Segment Growth
Repeats your own mesh segments along captured curves. Each piece follows a span of the guide; the source mesh is not continuously bent along the whole curve.
View node and settings →
Split
Divides an active path into two or more continuations. Every continuation bends away from the incoming stem; control inclination, radial spacing, split position and transition shape.
View node and settings →
Tree Root
Sets the name, overall size and starting positions of your trees. Place whole trees at a point, on a grid, around a ring or across an area; the connected Trunk node adds its own stems at every origin.
View node and settings →
Trunk
Creates the main stems. Arrange them at a point, on a grid, around a ring or across an area, then shape their height, lean and thickness.
View node and settings →
Twigs
Adds smaller branches to the current branch layer. Use its size profiles to vary twig size from the base toward the tips.
View node and settings →
Bend
Bends existing branches toward a chosen direction while keeping their attachments in place.
View node and settings →
Contact Hull
Cuts growth where it meets a captured hull surface. Choose a blunt cut or a tapered contact tip.
View node and settings →
Cross Section
Shapes procedural tubes with a closed Bézier contour. Edit its points and tangents, control alignment and dimensions, and blend from round to shaped along the Influence Range.
View node and settings →
Curl
Shapes branch tips into tightening or opening spirals. Control turns, inner and outer radius, sideways depth and variation between branches.
View node and settings →
Foliage Normals
Softens foliage shading using surface directions from a canopy-shaped proxy mesh. It helps individual leaf cards read as a fuller crown in High-quality builds.
View node and settings →
LOD
Creates progressively lighter plant versions. Reduce branches, twigs, foliage and mesh detail independently for different viewing distances.
View node and settings →
Length Randomize
Gives branches different lengths while keeping their attachments. Use it to break up a crown that looks too uniform.
View node and settings →
Noise
Give branches their own character with Legacy, fBm, fBm + Domain Warp or Curvature noise. Shape the path and tube surface independently, with profiles and seeded variation that keep the result repeatable.
View node and settings →
Prune
Removes whole branches that are too short, too long or too thin.
View node and settings →
Radius Profile
Shapes thickness with an editable curve. Create a flared base, a swollen middle or a fine tip.
View node and settings →
Resolution
Controls mesh detail around and along branches. Set an even edge size or choose fixed counts.
View node and settings →
Sag
Makes branches droop toward the ground. The bend increases away from the attachment for a heavier appearance.
View node and settings →
Smooth
Softens abrupt changes in a branch path. Use it after strong shaping operations when the result looks too angular.
View node and settings →
Taper
Changes branch thickness from base to tip. Adjust the two ends and the transition between them.
View node and settings →
Trim
Cuts branch ends to a chosen length or percentage. Use it for a clipped crown or more even branch lengths.
View node and settings →
Twist
Twists a tube and its attached foliage around the local branch tangent, or deforms the branch around a fixed axis. Limit the effect with Influence Range and Profile.
View node and settings →
UV Mapping
Controls how bark textures wrap around branch tubes, including repeats, seams and end-cap UVs.
View node and settings →
Vertex Color
Author independent RGBA masks for wind and shading. Combine structural gradients, foliage flutter and stable per-leaf random values, then carry the colors into your game-engine material.
View node and settings →
Gravity Force
Steers growth relative to gravity. Natural mode sends shoots against gravity and roots with it.
View node and settings →
Linear Force
Steers growth toward a world-space direction, for a preferred growing direction or a wind-shaped silhouette.
View node and settings →
Point Force
Pulls growth toward a Maya object or pushes it away. Move the target to guide branches or open a gap in the crown.
View node and settings →
Vortex Force
Steers growth around a Maya target's axis. Add inward pull or movement along the axis for coils and spirals.
View node and settings →
Collision
Steers the current branch shape around Maya meshes. Use it after shaping nodes, leave a surface gap, or attract growth along an obstacle for vines and ivy.
View node and settings →
Self Collision
Helps branches avoid each other or another connected branch structure. Natural attachment areas are excluded so branches can still join their parents.
View node and settings →
Dynamics
Adds wind-driven motion with separate Amount, Sway and Bend controls for trunks, branches and twigs, independent leaf flutter and seamless loops. Build once, then play or scrub Maya’s timeline.
View node and settings →
GameDynamics
Bring procedural trees into a skeletal wind workflow. Shape trunk, branch and twig motion, inspect the live joint hierarchy, then export a skinned rig and wind clip through Game Output. Experimental; leaf flutter belongs to your game-engine shader.
View node and settings →
Asset Array
Distributes captured meshes, generated leaves or nested assemblies into reusable asset arrangements. Build radial flowers, rows, grids, spirals, helices, phyllotaxis patterns or repeated elements along curves, with independent source choice and seeded transforms.
View node and settings →
Asset Assemble
Combines connected asset collections into reusable assemblies. Join petal layers, flower centers or modular parts, choose a source from each input and adjust each part locally without flattening the source graph.
View node and settings →
Asset Collection
Collects weighted Maya assets and combines connected Asset Generator outputs. Reuse the collection for leaves, fruit, flowers, repeated segments or texture atlases.
View node and settings →
Asset Generator
Creates editable leaf meshes directly in the graph. Draw the outline, place the attachment pivot, shape the leaf in 3D and generate a reproducible pool of variants for foliage placement.
View node and settings →
Asset Scatter
Places reusable assets along branches with count or density profiles, independent length, width and thickness, pivot alignment and optional static overlap avoidance.
View node and settings →
Leaf Volume
Places leaves on branch regions inside a closed volume mesh. Leaves stay attached to those branches, with optional overlap avoidance for static builds.
View node and settings →
Leaves
Attaches leaf meshes to branches. Arrange patterns, adjust orientation, add droop and optionally reduce overlapping leaves in a static build.
View node and settings →
Texture Atlas
Combines asset textures into shared sheets. Connect it to Game Output to remap foliage UVs for export.
View node and settings →
Tree Materials
Sets bark, cut-end and foliage materials, plus transparency and normal-map choices for delivery.
View node and settings →
Volume Scatter
Places assets inside or on a captured hull mesh. Use the hull as a volume for a full crown or a surface for repeated details.
View node and settings →
Game Output
Builds explicitly connected wood and foliage for game export, with optional LODs, texture atlases and packed maps. Connect Branches and Growth when the asset needs both components.
View node and settings →
Output
Builds explicitly connected wood and foliage as Maya geometry. Connect Branches for wood, Growth for foliage, or both for the complete plant; choose preview and final mesh detail.
View node and settings →
Mask
Selects where downstream nodes act without removing the supporting branches. Use a sphere, closed mesh, painted weights or a vertex-color channel, then continue through Mask or Invert Mask.
View node and settings →
Reroute Knot
Adds a small knot to guide a connection around the graph. It passes data through unchanged and has no settings.
View node and settings →
Structural Combine
Rejoins edited paths from a common structure, resolves overlapping changes and releases their active masks. Connect one path to simply finish a masked operation.
View node and settings →No matching nodes. Try a different node or setting name.
What is ZenGrove used for?
The ZenGrove 1.0.0 reference: 52 nodes, 907 settings and short WebM demos. Explore Look At asset orientation, GameDynamics, joint previews, skeletal export and per-leaf random vertex colors. Requires AO.Hub 1.6.6 or later.
Which host application does ZenGrove support?
ZenGrove is built for Autodesk Maya and is distributed through AO Studio Tools.
Where can I download ZenGrove?
Download the current AO Studio Tools package from https://aostudio.tools/getthetools.html and install it through AO.Hub.